Tuesday, March 12, 2019

Working on a New Quilt

 Hi everyone.

A couple of months ago I brought a couple of jelly rolls from JoAnn's and needed to make something with them. (Why does JoAnn's sell their jelly rolls with only 20 pieces, meaning we have to buy 2 of them for most quilts?) I had been looking for a pattern for a while now and fell in love with the look of strip quilts. But most of them had strips of the same size and I wanted something where I didn't have to worry about matching up seams.  So based on a couple of online tutorials and pictures I started cutting up the jelly rolls and some fat quarters. Here is a picture of the piles of cut up fabric.


The strips were cut into 2.5" x 6.5" quarters were cut up into 1.5" x 6.5" and 3.5" x 6.5" rectangles. I cut way more rectangles then I ultimately needed but since I didn't know exactly what I was going to do I thought more would be better.  In total, I think I cut almost 500 rectangles.

I finally came up with a design and was able to use my EQ8 software to draw it out.


I decided to sew the rectangles into blocks instead of long strips. So I  came up with 5 blocks (A - E) each block measuring 6.5" x 8.5".  Based on the above picture the quilt will be 68" X 74" and have 400 rectangles but I haven't finalized the design yet because I have a lot of rectangles left over so I might include a piano key border.  Or make extra blocks to use on the back.
Still trying to figure that out but we'll see what happens.


Chain piecing on the machine and stacks of fabric left to go.


So far I've made the A Blocks.  And I'm really excited about how they look. And can't wait to see how this comes out. 

Unlike most of my quilts, this quilt already has a name. The fabric from JoAnn's has the Eiffel Tower and other French writings and so I came up with Paris as the name. 
 
Okay well, that's all for today.  

I do want to take a moment to say Hi to Noel who is my newest follower on Bloglovin'.  

And always Thank You All for stopping by.

Until next time...


Thursday, February 28, 2019

Another Plus Quilt Finished

Hello everyone!

I'm back with another plus quilt. As I've said before, the plus quilt pattern is one of my favorites. I'm pretty sure there will be many more in the future. 

And I'm okay with that. 😊


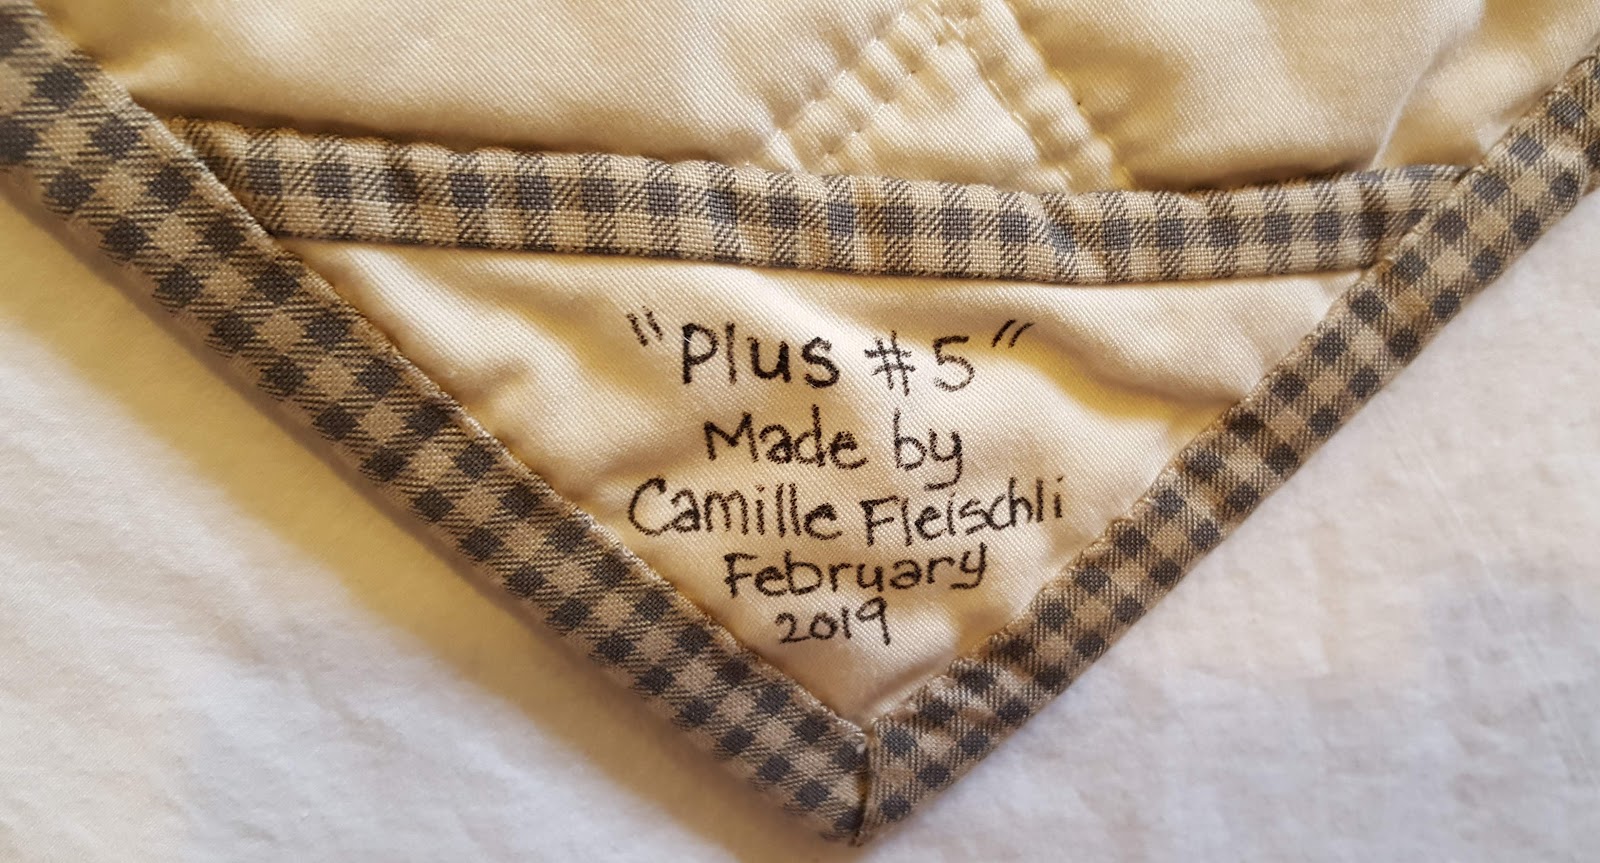
Front of Plus #5
The fabrics for this quilt are a combination of a Layer Cake of Boundless High Society, some leftover tan fabric from Boundless Ruby Fleur, and stash fabric from JoAnn's. The binding is a Gray Check also from Boundless High Society.


Back of quilt

Like most of my quilts lately, I used a thrift store sheet for the backing. 


I had no idea what to name this quilt so I just went with the obvious.  This is the 5th Plus quilt I've made so that's the name Plus #5.

The blocks were cut at 3". (Confession: I messed up on the cutting. I originally wanted the finished block to be 3" but when I went to cut up the fabric I had 3" stuck in my head instead of 3.5" and didn't realize my mistake until it was too late. 😞)

There are a total of 480 squares/blocks.

The quilting was my go-to design for the plus quilts I've made - straight lines 1/4" on both sides of the seams going vertically and horizontally. I love how the quilting looks on the back.

And the quilt finished at approximately 55" x 60".


Okay...that's it for today.  I've got a quilt in my head that uses 2 1/2" strips so I'm going to play with my EQ8 software and see if I can figure it out.

As always...thanks for stopping by.

Camille

Wednesday, February 20, 2019

More Thrifty Quilting Tips


Hello everyone!

I'm slowly getting my newest plus quilt completed. All that is left to do is hand sewing the binding on. Hopefully, that will only take a couple of days and I will be able to post pictures of the completed quilt next week. In the meantime, I have a couple of tips for you today. 

The first tip is finishing the quilt edges before binding. Once my quilt is quilted I trim it and then (here's the tip) I take it back to the sewing machine and stitch around the quilt edge to keep all the layers intact. I find that this helps me with the binding. 

Here are two pictures of what I do.


Sometimes I use a straight stitch and sometimes I use a zig-zag stitch though the zig-zag stitch does use up more thread.

The next tip is actually one of my favorites and I am so glad that I started doing it.  I use Elmer's Washable School Glue in many quilting steps.

When I first started quilting I was 'told' to use pins or Clover Quilting Clips. I found the pins hard to use and the Clover Clips were way more money than I wanted to spend though I was able to find some at a discount. But I still didn't like using them because I thought they just made the binding process that more difficult.

Then one day I was on Pinterest or just searching the web (don't remember which) and I found an article/blog that talked about using glue to hold the binding down. The next time I was at the store I brought some glue and I haven't looked back. I love it!!!

Not only do I use it for the binding but I also use it to attach labels to the quilts. 
Here are a bunch of pictures of the processes.

glue on the back of a label
                        
 
The back of the quilt 


How to apply quilt binding with glue:

Once you have sewn the binding to the front of your quilt take your quilt over to your ironing board.
I like to press the binding seam away from the quilt top (helps the fabric flip to the back) and clip my corners as well as make sure all the quilt is under the binding.

Then I turn the quilt over to the back side and apply a line of glue just above the stitch line or seam line of the quilt back. (Glue will make the fabric stiff which will make it more difficult to hand sew the binding down if you glue behind the seam line).

Fold the binding down in the section you glued, then set the glue with a hot, dry iron. Work around the perimeter and then you're done. I use a few Clover Clips on the corners and a few along the perimeter just to make sure it stays flat.

I don't quilt my binding by machine because I don't like the look of the stitching but if you do now you don't have to worry about the clips or pins getting in the way.

And the best time to buy the glue is during back to school shopping when you can usually get school glue on sale.

I hope you give these tips a try and let me know what you think.

Thanks for stopping by...

Camille

Sunday, February 10, 2019

WIP - Another Plus Quit

Hello and welcome to another edition of my blog.

Is there a quilt pattern that you come back to over and over again? A pattern that no matter how many times you use it, it never disappoints and every time you make it, it still makes you smile when the quilt is done?

Well for me its the plus quilt. 

This will be my 5th plus quilt. And I can honestly say it will not be my last one.

Why? Because it's as easy as a patchwork quilt and depending on the fabric you use the feel of it changes each time.

There are numerous tutorials on how to do it so I won't go into that but the pattern I use is based on this tutorial from In Color Order. I like that she just uses squares instead of squares and rectangles.

And, putting it together is like putting a jigsaw puzzle together. 

So here are a few pictures of the quilt so far...


Pluses on my design wall

Pluses on my cutting table

Still, lots more ironing and sewing to go. I haven't figured out a name for it yet but I usually don't name my quilts until it's all put together.

I think the next plus quilt I make will be using 8-inch squares.

Okay, that's all for today.

Thanks for stopping by...


Camille


Saturday, February 2, 2019

First Finish In 2019 - Rail Fence Quilt

Hello All,


Today I'm sharing with you my first finish of 2019. The quilt is named "Don't Fence Me In".

The inspiration came from Red Pepper Quilts.  I've been looking at the Rail Fence pattern for a while and finally just decided to do it.

I knew I wanted to do a quilt with blue, gray and green and my first fabric pull was based on those colors and though I loved the fabrics that I pulled I wasn't super happy with them. I felt like something was missing.

So while I was grocery shopping at WalMart I went through the fabric section looking for color combinations that spoke to me.


And I found this fabric. I didn't buy any of it because I didn't think it would go with my design but I loved the colors so I went back to my fabric stash and pulled more fabrics.


And settled on these.


So here it is...Don't Fence Me In.


This quilt was made with 14 Fat Quarters + scraps. I cut 2-inch x 6.5-inch strips from each FQ for a total of 336 strips and then added scraps to make 90 blocks. I squared the blocks at 6" x 6".  The backing is a faded sheet that perfectly matched the aqua fabric in the quilt. For the binding, I cut 2.5" inch strips from a gold fabric that matched the goldish yellow in the 'Aztec' looking fabric.
The quilting is a very simple straight line on the diagonal. The quilt finished at 48" x 53.5".

This will definitely not be my last Rail Fence quilt. It was pretty easy to make which is always a good thing. The next one I think will be scrappier and bigger.

On to the next quilt which I have already started on.

Thanks for stopping by...


Thursday, January 24, 2019

Hand Wash Your Ironing Board Cover


Have you been using an iron board with a cover that you're embarrassed to have anyone else see?

As you can see from these pictures my answer would be a resounding YES!


I'm sure you've seen the numerous postings on how to recover your ironing board. I was all set to use one of those tutorials to recover mine but if you've read my blog you know that I'm frugal. I would rather spend my money on quilting fabric. 

So I just kept using my ironing board with the nasty cover until I couldn't take it anymore. I went out and brought a sheet at the thrift store to use and it sat around for a while and for whatever reason I just didn't want to bother with making a cover. 

Then one day it dawned on me. The tag on the cover said do not machine wash. It doesn't say not to hand wash it. So that's what I did. I put a little fabric soap in my sink and plunked my cover into it and let it sit for about an hour. 

When I came back, all the thread that had been stuck on it was floating in a sink filled with brown water. The first time I did this when I fished out the thread it was the size of a baseball. I kid you not...a baseball. (Okay, I'll admit it...I had been using this grungy ironing board cover for almost 2 years.)

After rinsing it out a few times until the water was clear I threw it in the dryer and when I pulled it out, it was almost like new.


So now, I wash my cover once a month and the sheet I had brought to use for a new cover has been moved to my stash instead.

Hopefully, this tip saves you money you can spend on quilting fabric, which in my book is a win-win.

Thanks for stopping by...


Wednesday, January 16, 2019

My 2019 Quilting Goal

Hi!

Are you the type of person who starts the new year off with a list of resolutions? 

Usually, I am not that person.  I sometimes write down things I want to accomplish during the year but I don't call them resolutions because I don't like to the feeling of failure at the end of the year when those resolutions are not achieved.

But for the past few days, I've been thinking about goals and resolutions.

First off, I had to know what is the difference between a goal and a resolution? I googled it and found a lot of different websites with definitions. But basically, here is what I found.

A Resolution is a decision to do or not do something and a Goal is the object of a person's ambition or effort; an aim or desired result. Goals provide a direction to follow to achieve the desired outcome. 

So for 2019, my desired outcome is to become a better quilter, blogger and to eventually make money doing what I love. 

So here is a list of my action plan or steps necessary to make my goal a reality.

  • Learn how to use the Electric Quilt 8 software that I got for Christmas.
  • Make a string quilt.
  • Make a quilt using templates.
  • Make a quilt using paper piecing and/or foundation piecing
  • Work on my free motion quilting technique.
  • Post on my blog every week.
  • Figure out Photo Shop to use on my blog.
  • Take an in-person quilt class.
  • Participate in a quilt along.
  • Move my quilt "studio" out of the loft and into Connor's room.

Looking at my list, my goal does not seem unattainable. 

I'll let you know how it goes.


In the meantime...back to quilting.


Here's the quilt top for my newest quilt. I'm working on a Rail Fence quilt using fat quarters and scraps from my stash. Today I'll be figuring out the backing and cutting the binding strips and if I have time I will start the basting.  Hopefully, I'll be done with the whole thing in about two weeks.


Next post I'll have some tips and tricks for you.


Until then...


Camille F.